PUPPY CHOW FOR CHILDREN

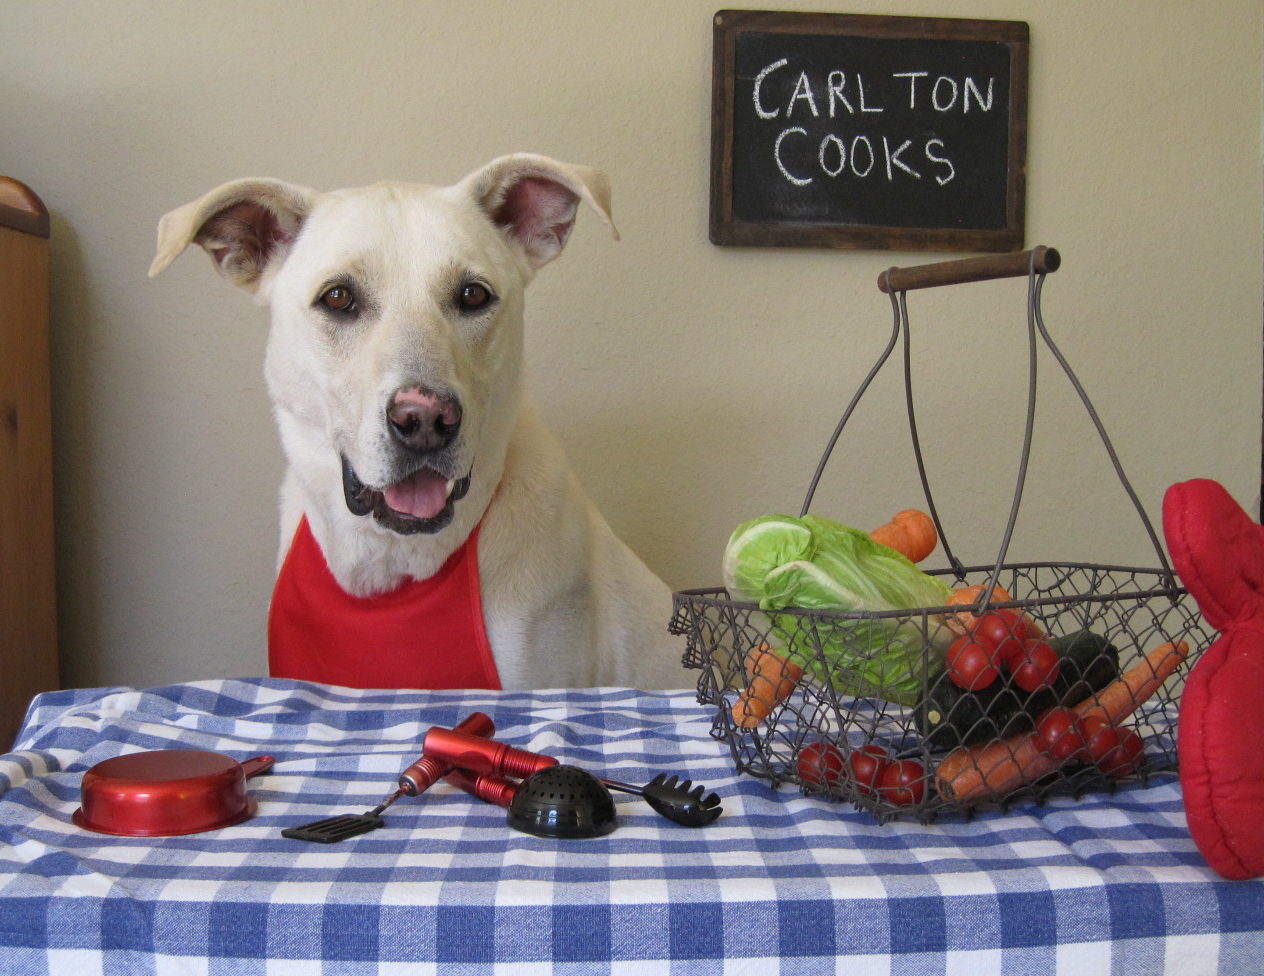
Carlton the dog shows us the ingredients needed to make Puppy Chow for Children
Can you tell which ingredient is missing? Answer at the bottom of this page.

Good cooks know the word: Boil

Boiling occurs during cooking when large bubbles rise from the bottom of the pan to the surface of the water or mixture in the pan. When the bubbles pop it allows steam to escape.

INGREDIENTS:

4 cups whole grain square cereal made from rice

4 cups whole grain square cereal made from wheat

1 cup peanuts

1/2 cup butter

1/2 cup brown sugar

2 tablespoons corn syrup

1/4 teaspoon salt

 1/4 teaspoon baking soda

1 teaspoon vanilla

Cake sprinkles

TOOLS:

1 large roasting or casserole pan greased, sprayed with non-stick spray, or lined with foil

Dry measuring cups

Measuring spoons

1 saucepan

Mixing Spoon

DIRECTIONS:

Heat oven to 375°F.

Spray large roasting pan or casserole with non-stick cooking spray.

Combine cereal and peanuts in the roasting pan and set aside.

Here are the cereal squares and peanuts needed to make Puppy Chow for Children.
I see how the recipe got its name. The wheat and rice squares do look a little bit like real dog chow.

Mix the butter, brown sugar, corn syrup, salt and baking soda in the saucepan.

Cook over medium heat. Have your adult stir the pan until the ingredients begin to boil and then remove the pan from the heat.

This is the butter and sugar mixture that boils and is then poured over the dry cereal squares to make Puppy Chow for Children.
When the mixture boils, quickly remove it from the heat.

Stir the vanilla into the mixture in the saucepan, and then pour over the cereal and nuts in the roasting pan. Stir to coat.

Bake for 10 minutes, stirring halfway way through. (So how many minutes does the mixture need to cook for before you stir? 5 minutes.) For very crispy Puppy Chow for Children, let the mixture cook for an additional 5 minutes, watching to make sure it does not get too brown.

This Puppy Chow for Children topped with colorful sprinkles is perfect for any celebration!
Allow your Puppy Chow for Children to cool slightly before adding sprinkles. If you sprinkle too soon, they will melt!

Remove the pan from the oven, and let the mixture cool slightly before shaking the sprinkles over it. Give one final stir.

Cool completely before eating.

Makes 10 servings.

Puppy Chow for Children will keep for one week in a sealed bag or container.

Answer. The vanilla is missing from the ingredients picture above.
Kiss Me, I’m Irish!

Let’s make Golden Carrot Coins!

Carlton says "Top of the morning to you," as he wears St Patrick's Day shamrock glasses and he and Finnegan the leprechaun share the recipe Golden Carrot Coins for St Patrick's Day dinner.
Top of the morning to you!

Top of the morning to you, is a greeting that usually makes people think of Ireland and St. Patrick’s Day. On St. Patrick’s Day, some people like to wear green and search for leprechauns and their gold. What recipes do leprechauns like to make for St. Patrick’s Day dinner?

Today my friend Finnegan is bringing some gold to us! He’s sharing his delicious St. Patrick’s Day recipe for Golden Carrot Coins. This recipe uses roasted carrots and a little bit of orange juice and honey. Roasted vegetables turn brown at their edges and taste sweeter after roasting. This is called caramelization. Roasted vegetables are also easier to cut for cooks who are just learning to use a kitchen knife. Both carrots and oranges are full of Vitamin A which is very good for keeping your eyes healthy. Just remember, you have to eat bright colors to see bright colors!

Carlton replies, "And the rest of the day to yourself," as he wears his leprechaun hat for St. Patrick's Day and shares his recipe for Golden Carrot Coins.
And the rest of the day to yourself!

P.S.- Finnegan says that when someone says, “Top of the Morning to You,” a leprechaun might reply by saying, “And the rest of the day to yourself!”

Golden Carrot Coins

Top of the Morning to You on St. Patrick’s Day!

Today my friend Finnegan and I are sharing the recipe for Golden Carrot Coins

Carlton from CarltonCooks.com and Finnegan the Leprechaun share the the recipe to make Golden Carrot Coins for St. Patrick's Day!
Carlton and Finnegan the Leprechaun share the the recipe to make Golden Carrot Coins for St. Patrick’s Day!

GOLDEN CARROT COINS

Good cooks know the word: Roast

To use dry heat and hot air, often from an oven or open fire, to cook foods like meat and vegetables.

To make Golden Carrot Coins you need carrots, butter, olive oil, honey and one orange.
To make Golden Carrot Coins you will need carrots, olive oil, butter, honey and one orange

INGREDIENTS:

¾ pound of carrots (This will be 3-4 carrots depending on their size.)

1 Tablespoon of olive oil

1 Tablespoon of butter, melted

1 Tablespoon of honey

½ teaspoon of grated orange zest (the colorful outer part of the peel)

2 Tablespoons of orange juice

Salt and pepper to your taste

TOOLS:

One vegetable peeler

Measuring spoons

One roasting pan or cookie sheet with raised sides, greased

One small saucepan

One zester or grater

One hand-held citrus juicer

Mixing spoon

DIRECTIONS:

Step 1:

First, preheat the oven to 400 degrees.

Next, wash and peel the carrots.

Pour a bit of olive oil in the palm of your hand and rub it over each carrot until they are covered with oil.

To make Golden Carrots Coins, begin by rubbing olive oil on the peeled carrots to help them roast evenly.
Before roasting the carrot, rub them with a bit of olive oil to help them roast evenly.

Place the carrots on the roasting pan or cookie sheet. (Line the pan with foil if desired to make cleanup easier.) Roasting the carrots will make them easier for you to cut.

Roast the carrots uncovered at 400 for 12-15 minutes or until they soften and begin to brown at their edges.

When making Golden Carrot Coins, the edges of carrots rubbed with a bit of olive oil will caramelize, turn golden in color, and taste sweeter after roasting.
The edges of carrots rubbed with a bit of olive oil will caramelize, turn golden in color, and taste sweeter after roasting.

Remove carrots from the oven at let them cool.

Step 2:

While the carrots cook, make the carrot coin glaze.

Zest the orange.

Juice the orange.

In a small saucepan, mix together the honey, melted butter, and the zest and juice from the orange. Cook over medium heat 3-5 minutes or until the glaze begins to thicken. Remove from heat.

Step 3:

When the carrots are cool enough to touch, slice them so that they look like thick coins. Some of the coins will be as round as a quarter. Others will be as round as nickels and dimes! All of them should be about ¼ -½ inch thick.

Add the carrots to the glaze in the saucepan.

Stir over medium heat for 2-3 minutes, or until carrots coins are heated. Watch to make sure the glaze does not burn.

Makes 6 servings.

Golden Carrot Coins make a a great side dish for your St. Patrick's Day dinner.
Golden Carrot Coins make a a great side dish for your St. Patrick’s Day dinner.

PS- Golden Carrot Coins are great when served as a side dish for your St Patrick’s Day dinner.

Happy Fettuccine Alfredo Day!

Carlton the dog is wearing a real moustache as he gets ready to show us how to make Fettuccine Alfredo on Fettuccine Alfredo Day.
Yes, I wore a real moustache for this picture. I am a Good Boy!

February 7th is Fettuccine Alfredo day!

Fettuccine Alfredo is a dish of fettuccine noodles covered in a cheesy white sauce. Do you know who invented the dish?

One hundred and eleven years ago a man named Alfredo Di Lelio worked in a small restaurant in Italy. His wife had just had their first baby and Alfredo wanted to make her a tasty meal. He made her a dish of noodles with butter and fresh cheese and she loved it.

Soon after that, Alfredo opened his own restaurant. Can you guess what he named the new restaurant? Alfredo!

People came from all over the world to eat Alfredo’s noodles. They were so delicious that some very famous movie stars gave him a fork and spoon made of solid gold engraved with the words, “To Alfredo the King of the noodles.”

Many years later, Alfredo sold his restaurant. Later, he opened a new one with his son. The name of the restaurant is Il Vero Alfredo. In Italian this means, the true Alfredo. If you go to Rome, Italy you can still eat Fettuccine Alfredo at Il Vero Alfredo restaurant today!

I like to make my Fettuccine Alfredo with just a little bit of added milk or cream. Come cook with me! Let’s celebrate Fettuccine Alfredo day by making some Fettuccine Alfredo at home!

Fettuccine Alfredo

FETTUCCINE ALFREDO DAY is February 7th!

Good cooks know the word: Colander  A colander looks like a bowl with handles and holes. A Colander drains liquid from foods.

INGREDIENTS:

¾ pound of fettuccine noodles (12 ounces of dry noodles)

2 Tablespoons butter

½ cup of Half and Half (whole milk can also be used, but it will affect the texture of the sauce)

½ cup grated Parmesan cheese

¼ teaspoon nutmeg

¼ cup of pasta water from cooked fettuccine

Salt and pepper

TOOLS:

One 8-quart stockpot

One 2-quart saucepan

Mixing spoon

One colander

Liquid measuring cup

Dry measuring cups

Measuring spoons

DIRECTIONS:

1.To begin, have all of your ingredients measured and ready, mise en place (remember, that means things in place. )

2. Cook fettuccine noodles in the stockpot as directed.

3. While your fettuccine cooks, melt the butter in the saucepan over medium-low heat.

4. Add the Half and Half to the butter in the saucepan and stir.

Begin making Fettuccine Alfredo sauce by melting butter and adding Half and Half.

5. Next, add the cheese to the butter and Half and Half mixture. Continue to stir.

6. Before draining the fettuccine, have your adult remove ¼ cup of the water used to cook the fettuccine and set aside. Using the colander, drain fettuccine and return to the stockpot.

7. Add the ¼ cup of reserved fettuccine water to the sauce in the saucepan and continue to stir.

8. Add the nutmeg to sauce in the saucepan and stir. The mixture will begin to look creamy.

Once you add the pasta water and stir, your Fettuccine Alfredo Sauce will begin to look creamy.

9. Pour the sauce over the fettuccine in the stockpot and stir.

10. Finally, place the fettuccine on a platter or in serving bowls. Try a bite and then sprinkle with salt and pepper if desired. Makes 6 servings.

Fettuccine Alfredo can be served on a platter just like this one for your family to share at the table. Adding broccoli or peas make a tasty treat!
For a tasty treat, try adding broccoli or peas to your Fettuccine Alfredo. Yum! When you serve food on a platter so everyone can serve themselves, it is called “eating family style.”

Psst. Want to know a secret about food glue? Good cooks use a little leftover pasta water when they cook because the starch left in the water after cooking the noodles acts like glue and helps the sauce stick to the noodles.

January is National Oatmeal Month!

Can you guess what we’re going to bake? How about some Fruity Baked Breakfast Oatmeal?

Did you know that January is National Oatmeal Month? People buy more oats in January than any other month of the year. Why do you think that happens?

Today we are making delicious Fruity Baked Breakfast Oatmeal.

Did you know?

  • Oatmeal is a whole grain and can help you feel full until your next meal.
  • Oatmeal keeps your heart healthy and can help reduce cholesterol.
  • The word groat is the name for the kernel of any grain such as wheat, rye, barley or oats.
  • The words Oat groats sound funny together because they rhyme. Can you think of other words that rhyme with oats and groats that might sound even funnier? (How about a goat in a coat, floating on a boat in a moat, while writing a note, getting ready to vote, and eating a tote full of oat groats! If you draw a picture of this, I’d love to see it!)
  • You can buy oat groats at some stores, but they take a long time to cook.
  • If you cut an oat groat into pieces, you get Steel Cut Oats.
  • If you steam oat groats and roll them until they flake, you get Old Fashioned Oats.
  • If you steam oat groats for a longer time and roll them into thinner flakes you get Instant Oats.

So say the words “oat groat” ten times fast. And then, use some Old Fashioned Oats to make my Fruity Baked Breakfast Oatmeal.

Fruity Baked Breakfast Oatmeal

You can make this oatmeal the night before and let it sit in the refrigerator until you bake it in the morning, or you can make it, bake it, and serve it right away.

Good cooks know the word: Grease – to put butter, fat, oil or non-stick cooking spray on a pan to prevent cooked food from sticking. When you grease a pan, the word is a verb. When people call fats and oils by the name grease, the word is a noun. Mechanics also use a type of grease to fix cars, but that is a different kind of grease that we will never use in cooking!

INGREDIENTS:

1½ cups old-fashioned oats

1/4 cup brown sugar

3/4 teaspoon baking powder

1 1/2 teaspoons cinnamon

1/4 teaspoon salt

1 cup dried cranberries (or other fruit that you like)

1/2 cup sliced almonds

1¼ cups milk

1/4 cup maple syrup

1 egg, beaten

2 Tablespoons of butter, melted

½ teaspoon vanilla

TOOLS:

One large mixing bowl

One medium mixing bowl

Dry measuring cups

Measuring spoons

Mixing spoon

Liquid measuring cup

Whisk

2-quart baking dish

DIRECTIONS:

  1. Preheat the oven to 375 degrees.
  2. Grease the baking dish.
  3. In the large bowl, combine the oatmeal, sugar, baking powder, cinnamon, salt, cranberries and almonds. These are your dry ingredients.
These are the ingredients for Fruity Baked Breakfast Oatmeal.
These are the dry ingredients for Fruity Baked Breakfast Oatmeal.
 These are the mixed dry ingredients for Fruity Baked Breakfast Oatmeal.

4. Next, whisk together the milk, syrup, egg, butter, and vanilla in the medium bowl. These are your wet ingredients.

These are the wet ingredients for Fruity Baked Breakfast Oatmeal.
These are the mixed wet ingredients for Fruity Baked Breakfast Oatmeal.

5. Add the wet ingredients to the dry ingredients and stir.

6. Finally, pour the mixture into the baking dish.

7. Bake 20-25 minutes. Serves 4.

This is Fruity Baked Breakfast Oatmeal.
I know there is some Fruity Baked Breakfast Oatmeal missing, but the cinnamon smelled so good that i couldn’t resist!

Make Snow Day Snow Candy!

I have been waiting and waiting for it to snow. Last night, there was a blizzard in my town, and this morning I got to play in the snow. Today, we’ll make Snow Candy.

Carlton the dog catches snowflakes on his tongue before using his recipe to make Snow candy.
Can you catch a snowflake on your tongue?


If you live in a place where it never snows, don’t worry, you can use a plate of shaved or crushed ice instead of snow to make this Snow Candy.


SNOW CANDY

These are the ingredients to make Snow Candy.
Make sure you find CLEAN snow!

Make Snow Candy on a Snow Day.

Good cooks know: Mise En Place. It may sound fancy, but the phrase mise en place is really just a French cooking term that means “setting in place.” When you say it out loud, it sounds like you are saying Meeze-on-Plahs. When I think of mise en place, I like to say “things in place.” Say that 3 times fast. Things in place. Things in place. Things in place.

When making some recipes you must have mise en place, otherwise you might burn your food and ruin the recipe. Snow Candy is that kind of recipe.

Safety Note: This recipe creates a boiling liquid and requires that a grownup do all of the work at the stove-top in addition to pouring the candy onto the snow. And remember, good cooks always read the entire recipe before they begin to cook.

INGREDIENTS:

1 cup of butter

1 cup of sugar

3 tablespoons of corn syrup

1 tablespoon of water

TOOLS:

Measuring spoons

Dry measuring cups

1 wooden spoon for stirring

1 stockpot or large (6 quart) saucepan

1 9×13 cake pan filled with CLEAN snow

Candy thermometer if desired

1 liquid measuring cup filled with completely with ice, topped off with water, and set aside.

DIRECTIONS:

  1. First, measure all of your ingredients and have them ready to use, mise en place, before you start to cook.
  2. Fill the liquid measuring cup with ice, and then add water to fill the spaces between the ice cubes. Set the ice-filled cup aside. This water will not be used in the recipe. It will be used to test the candy after it cooks
  3. Next, HAVE YOUR ADULT place the butter, sugar, syrup and 1 tablespoon of water in the sauce pan and cook on medium, stirring constantly to prevent scorching. This recipe burns very easily. Your adult must stay with the pan at the stove until the candy is done.
This is a pot with the sugar, water, corn syrup and butter used to make Carlton's Snow Candy.
Place the sugar, water, butter and corn syrup in a stock pot.
This is Carlton's Snow Candy as the mixture thickens and becomes golden.
The mixture will turn a golden color, thicken, and follow the spoon around the pan.

4. When the candy mixture in the pan is a golden color, thickens slightly, and begins to follow the spoon around the pan, HAVE YOUR ADULT test it in the glass of ice water by dropping a teaspoon of the mixture onto the ice-filled cup. (Remember to keep stirring the contents of the pan.) Give the candy in the cup twenty-five seconds to cool (count to 25!) and taste the sample from the icy water. The mixture should be crunchy and not stick to your teeth. Candy-makers call this the hard-crack stage. If your adult uses a candy thermometer, it will read between 300 and 310 degrees. Remove the candy immediately from the stove. It will burn quickly at this stage.

This is Carlton's Snow Candy toffee being tested with ice water to be sure it is at the hard crack stage.
Test the candy using ice and water.

5. Finally, remember to step away as your adult gently pours the candy onto the snow-filled cake pan. Spread the candy in a thin layer over the snow. Let the candy sit on the snow for 8-10 minutes or until cool to the touch.

This is snow candy poured onto a plate of clean snow.
Have your adult pour the candy onto the snow.

6. Remove the candy from the snow and pat it dry with a paper towel. Break the candy into small pieces to eat.

Snow Candy on a plate.
Break the candy into pieces and enjoy!


Breakfast Burritos and Balloons!

I live in the Hot Air Balloon Capital of the world. Every year in October, the skies outside my house fill with Hot Air Balloons during the International Balloon Fiesta. The sight of them makes most dogs want to bark, but they make me want to cook up a batch of breakfast burritos.

The first burritos were created in Mexico. They are often filled with meat, fish or beans. When you eat them for breakfast they can be filled with eggs. The word burrito means “little donkey” in Spanish. Some people say that the burritos that we eat got their name because they carry lots of different things inside in the same way that donkeys carry many things in their packs.

The ends of a burrito are closed before the burrito is wrapped so that all of its filling remains inside. When you are flying up in the sky in the basket of a balloon, you want to be able to hold your breakfast in one hand while waving to people on the ground with the other! Let’s make Breakfast Burritos!